


2 Ways to Add Watermark to Photos to Protect Images
Have you ever snapped the perfect photo and only seen it shared online without giving it credit? Frustrating, right? That’s where watermarks come in handy. They help protect your work and showcase your creativity at the same time. But how do you watermark photos effectively without compromising their look? Stick around, and we will show you the pros and cons of using watermarks, plus two methods to help you place watermarks on photos seamlessly.

- GUIDE LIST
- Part 1. Should I Watermark My Photos
- Part 2. How to Watermark Photos: 2 Methods
- Part 3. Bonus Tip: How to Remove a Watermark You Don’t Want
- Part 4. FAQs
Part 1. Should I Watermark My Photos
Adding watermarks to your photos sounds brilliant, but is it always necessary? Let’s break it down.
- Protects Ownership: Helps deter unauthorized use of your images.
- Branding: Reinforces your personal or business brand.
- Traceability: It makes it easier for people to find the photo's original source.
- Can Distract from the Image: A poorly placed or bold watermark may ruin the photo’s aesthetic.
- Not 100% Foolproof: Some determined users can remove watermarks.
- Time-Consuming: Adding watermarks to multiple photos can be tedious.
Part 2. How to Watermark Photos: 2 Methods
Ready to dive into how to add watermark to photos? Here are two tools that make it a breeze.
1. Add a Watermark to Multiple Photos in Photoshop
Photoshop is a super versatile tool for editing photos, popular among professionals and hobbyists. One of its many features is adding watermarks to your pictures, which can help protect your work and give it a professional touch. A watermark is like your signature or logo placed on your photos to prevent unauthorized use. Whether you're a photographer, digital artist, or just someone who likes to share creative work online, adding a watermark using Photoshop is wise to protect your content.
Steps to embed a watermark to photos in Photoshop:
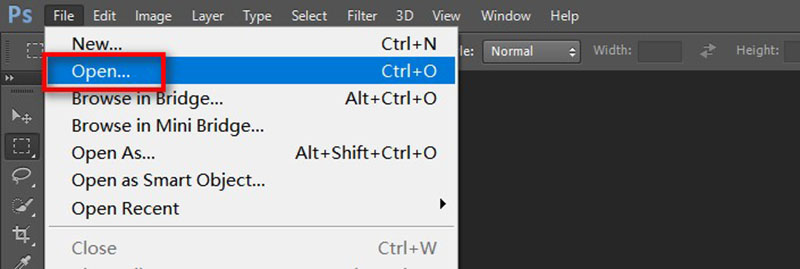
Launch Photoshop and open the image you want to watermark by going to File > Open, then selecting your photo.
Select the Text Tool (T) from the toolbar if you use text.
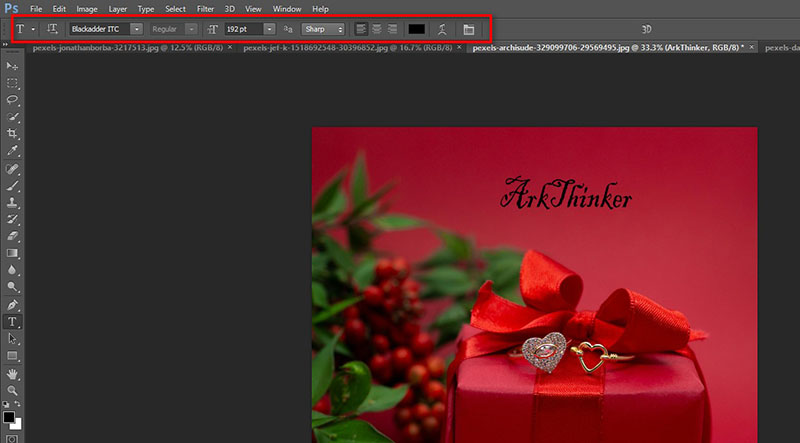
• Click on the photo and type your watermark text (for example, your name or brand).
• Customize the font, size, and color from the options bar at the top.
• Use the Move Tool (V) to drag the text or logo to your preferred spot on the photo (usually, the bottom corner works best).
• In the Layers panel, lower the opacity of the watermark layer (around 30% to 50% works well) to make it subtle but visible.
Optional steps:
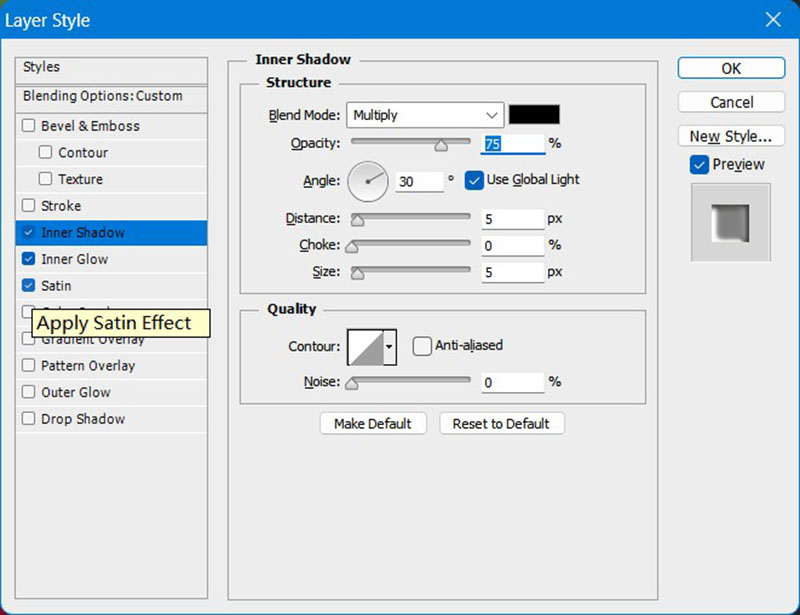
Right-click the text layer and select Blending Options to make your watermark look more polished. Add a slight Drop Shadow or Bevel and Emboss for a subtle 3D effect.
If you've added multiple layers to your watermark, select them all by holding Shift, then press Ctrl + G (or Cmd + G on Mac) to group them.
Go to File > Save As, choose a format (like JPEG or PNG), and click Save.
Keep a Photoshop version (.PSD), too, so you can reuse or edit your watermark later.

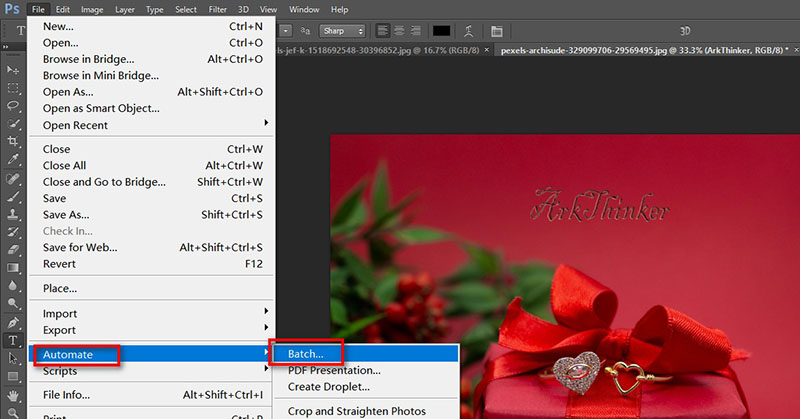
Note: If you have multiple photos to add a watermark, use Photoshop’s Actions feature to automate watermarking numerous images simultaneously if you're dealing with large batches.
This process will help protect your creative work while keeping it professional and stylish.
Also, if you want to remove a watermark from the image in Photoshop, this tool can also work.
2. Add a Watermark to Photos in Canva
Canva is a super user-friendly online design tool that lets you create and edit graphics, including adding watermarks to your photos. Whether you want to protect your work, promote your brand, or add a creative touch, Canva makes it easy with its drag-and-drop interface and many customizable templates. You don’t need to be a pro designer; just a bit of creativity and a few clicks will do the trick!
Steps to add a watermark in Canva:
Go to www.canva.com and log in to your account, or create one if you’re new.
Click the Create a Design button and choose a custom size or a template that fits your photo.

On the left-hand menu, select Uploads, click Upload files, and choose the photo to which you want to add a watermark. Drag it onto the canvas.

Click the Text option from the menu, choose a text style, or select Add a heading. Type your desired watermark text (like your name, brand, or copyright symbol).

Here, you can customize the image watermark size:
• Change the font, size, and color as you like.
• Position the text where it won’t interfere with the photo’s main content.
• Adjust the transparency by clicking the checkerboard icon in the top toolbar and dragging the slider to make the text slightly see-through.
Note: If you have a logo, upload it the same way as your photo and drag it onto the canvas. Resize it and adjust the transparency for a subtle effect.
Click the Share button in the top right and choose Download. Select your preferred format (PNG or JPEG) and hit Download.
And that’s it! You now have a professionally watermarked photo ready to share.

Part 3. Bonus Tip: How to Remove a Watermark You Don’t Want
We all make mistakes, right? If you accidentally watermark a photo or download one with a watermark, ArkThinker Watermark Remover Online has your back.
It is a versatile web-based tool designed for editing images by either removing or adding watermarks. While its main feature is to cleanse unwanted watermarks from photos, it also allows users to add custom watermarks, which is great for branding or personalizing pictures. The tool is user-friendly, works directly from your browser without requiring installation, and supports different text and image watermark styles, making it super convenient for students, hobbyists, or anyone who enjoys photo editing.
Fire up your browser and head to ArkThinker Watermark Remover Online. Once there, click Add File to Start to upload the image with the watermark you want to remove.
Select the brush tool and highlight the watermark area after adding your image. Then, click Remove.
When everything looks good, click the Download button to save your image without the watermark.

Thanks to the user-friendly layout, the whole process is super easy to follow.
Part 4. FAQs
Can I add a watermark to multiple photos at once?
Tools like Photoshop make batch processing a breeze.
How can I design a watermark that doesn’t ruin my photos?
Keep it subtle; use light opacity, a small size, and place it in a corner.
Is it legal to remove watermarks from photos?
Not usually. Removing watermarks from someone else’s work without permission is typically against copyright laws.
Conclusion
Watermarking photos doesn’t have to be complicated or time-consuming. Using Photoshop or Canva, you can protect your images and brand your work. Also, if you have images with watermarks that need removal, try ArkThinker Watermark Remover Online and get started!
What do you think of this post? Click to rate this post.
Excellent
Rating: 4.8 / 5 (based on 433 votes)
Find More Solutions
How to Watermark Photos on iPhone: Methods with Apps and Tools Top 5 Apps to Remove Watermark on Mobile [Free Incl.] 2 Easy Ways to Remove a Reddit Watermark Quickly Remove Watermark in Lunapic & Its Alternative [2024] How to Add and Remove Watermark in Bluebeam PDF Files Movavi Watermark: Full Guide to Add and Remove ItRelative Articles
- Edit Image
- How to Edit and Crop Animated GIFs with 4 Effective Ways
- 10 GIF Converters to Convert Between Images/Videos and GIFs
- Best GIF Editor Tools Suitable to Any Computers and Devices
- How to Make GIF from Images on Desktop and Mobile Phone
- Quick Steps on How to Add Text to a GIF Using Caption Maker Tools
- Add Music to GIF: Incorporate Music to Your GIF After Converting
- GIF Resizer: Ultimate Tools to Resize Your Animated GIF
- [6 Tools] How to Set a GIF Loop Change and Play It Forever
- GIF Cutter: How to Cut GIF with Easy and Fast Methods
- How to Remove Alamy Watermark from Images (100% Working)