


How to Convert M4A to WAV in High Quality (4 Tools)
When it comes to audio formats, M4A and WAV are two popular choices. While M4A is great for its compression efficiency and quality, WAV files are preferred for their lossless audio quality. Whether you're a professional or an enthusiast, converting M4A to WAV can significantly enhance your audio projects. Follow this guide to get the best 4 ways to convert M4A to WAV on the computer and mobile phone with a full-to-full guide.

- GUIDE LIST
- Part 1. Why Should I Change M4A to WAV?
- Part 2. How to Convert M4A to WAV (4 Ways)
- Part 3. FAQs
Part 1. Why Should I Change M4A to WAV?
WAV files are the gold standard for audio quality. Unlike M4A, which compresses audio data, WAV files are uncompressed, ensuring you retain every bit of audio detail. This makes them ideal for:
• Professional Audio Editing: Maintain the highest quality for intricate edits.
• Music Production: Preserve the integrity of your sound.
• High-Fidelity Playback: Experience the best audio on premium sound systems.
• Universal Compatibility: Enjoy seamless playback across all platforms and devices.
Part 2. How to Convert M4A to WAV (4 Ways)
How to Convert M4A to WAV Using iTunes
Apple created iTunes, a flexible media player and library program that can convert M4A to WAV files. iTunes's built-in capability makes it easy for customers to organize and convert their music files. iTunes is a handy choice for people inside the Apple ecosystem because it converts files effectively while preserving high audio quality.
Converting M4A files to WAV format in iTunes is a straightforward process. Follow these steps to perform the conversion:
Open iTunes
Launch iTunes on your desktop. Make sure you have the most recent version installed to ensure optimal compatibility and performance.
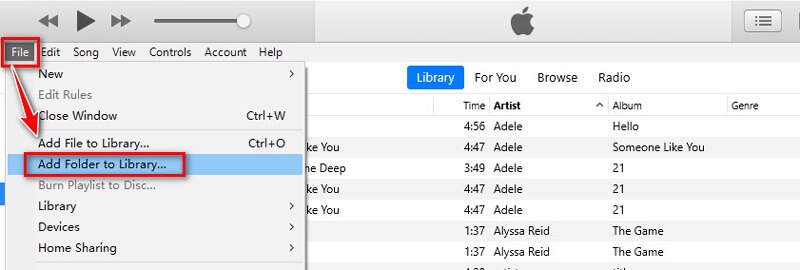
Import M4A files
If your M4A files are not already in your iTunes library, you need to import them.
Click on File in the menu bar. Select Add File to Library or Add Folder to Library to browse to the location of your M4A files and select them.
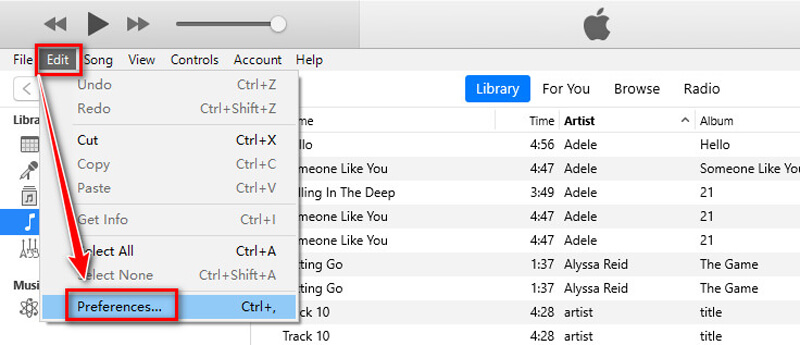
Adjust import settings
Click on Edit (Windows) or iTunes (Mac) in the menu bar. Select Preferences.
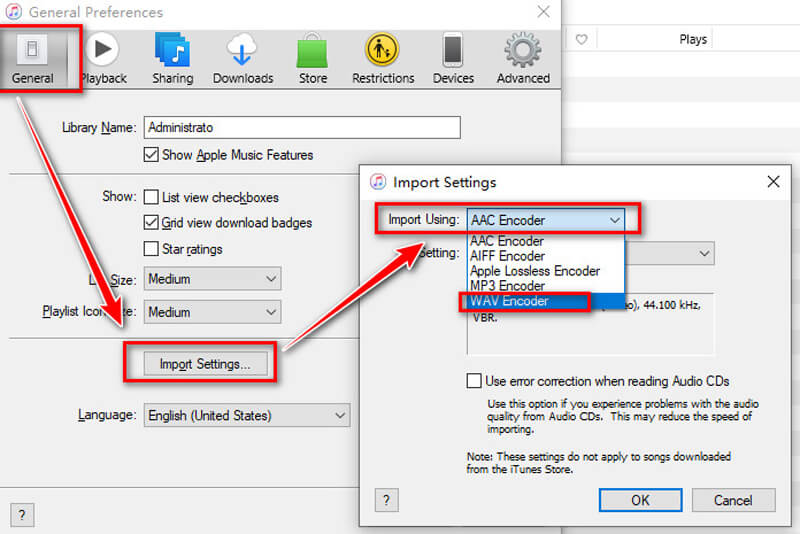
Then go to the General tab. Click on Import Settings, select the WAV Encoder from the list of Import Using dropdown. Click OK to save your settings.
Convert M4A to WAV
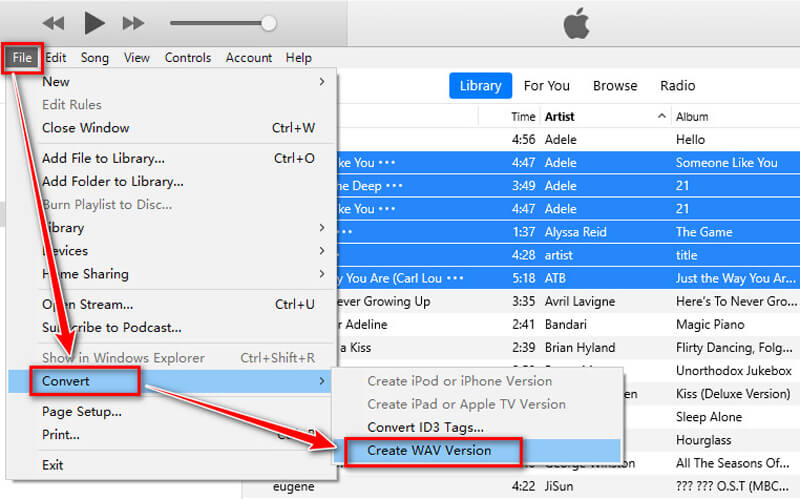
Go to your iTunes library and locate the M4A files you want to convert.
Hold down the Ctrl (Windows) or Command (Mac) key while clicking on each file allows you to choose several file.
Click on File in the menu bar. Go to Convert. Select Create WAV Version.
Then iTunes will create new files in WAV format from the selected M4A files.
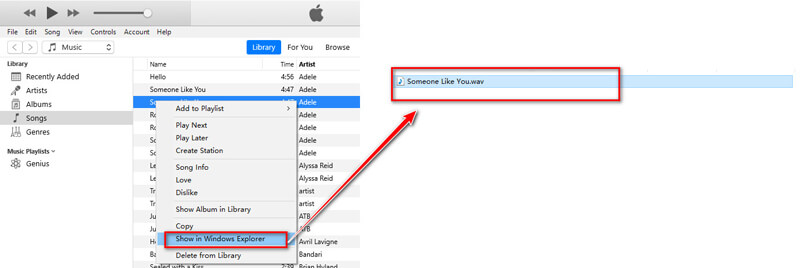
Locate the converted WAV files
Once the conversion process is complete, the new WAV files will appear in your iTunes library alongside the original M4A files.
To locate the converted WAV files on your computer, right-click on the file in iTunes and select Show in Windows Explorer (Windows) or Show in Finder (Mac).
Personal Tips:
Ensure your iTunes is updated to avoid compatibility issues. iTunes can be a bit slow for batch conversions, so patience is key.
Summary:
With iTunes, converting M4A to WAV is quick and easy. The integrated conversion feature in iTunes makes sure that the quality of your audio is preserved throughout the process. It is devoid of customizable options and sophisticated features, nevertheless.
- Free to use.
- Integrated with your music library.
- Decent output quality.
- Limited to basic conversions.
- Moderate conversion speed.
- Only available on Windows and Mac.
How to Convert M4A to WAV in ArkThinker Video Converter Ultimate
ArkThinker Video Converter Ultimate is an all-in-one multi-media converter designed for converting various audio and video formats, including M4A to WAV. With outstanding quality retention, it plays vvarious audio file types, including MP3, WAV, M4A, FLAC, OGG, WMA, and more. Because of this software's user-friendly design, users of different skill levels can easily complete the converting procedure. Apart from its basic features, ArkThinker Video Converter Ultimate offers a range of customization choices, including the ability to modify audio settings and trim audio files so that users can customize the result to suit their requirements. Its efficiency and user-friendly design make it a reliable choice for converting M4A to WAV.
Follow these detailed steps to achieve the conversion in ArkThinker Video Converter Ultimate.
Download ArkThinker Video Converter Ultimate
Get the ArkThinker Video Converter Ultimate installer for free via the following download links on your Windows or Mac computer. Then follow the on-screen instructions to install and run this M4Aa to WAV converter on your computer.
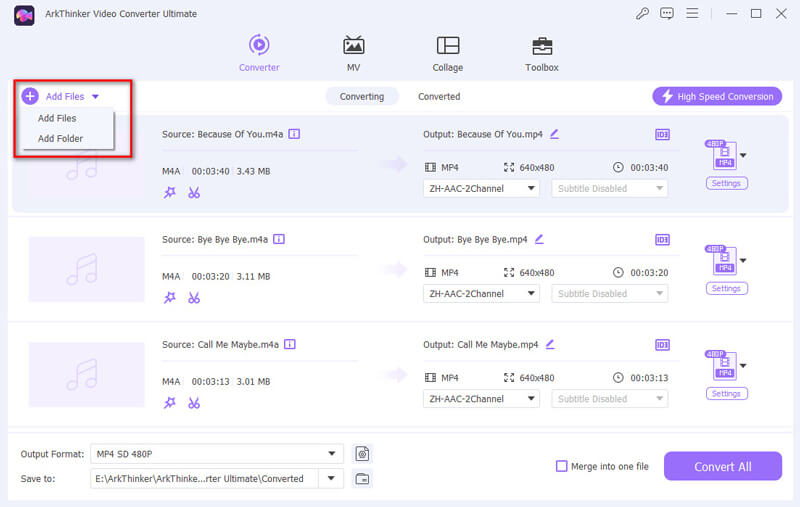
Add M4A files
Click the Add Files button in the upper left corner of the main interface.
Locate the M4A file or files you wish to convert on your computer, then add them to this program.
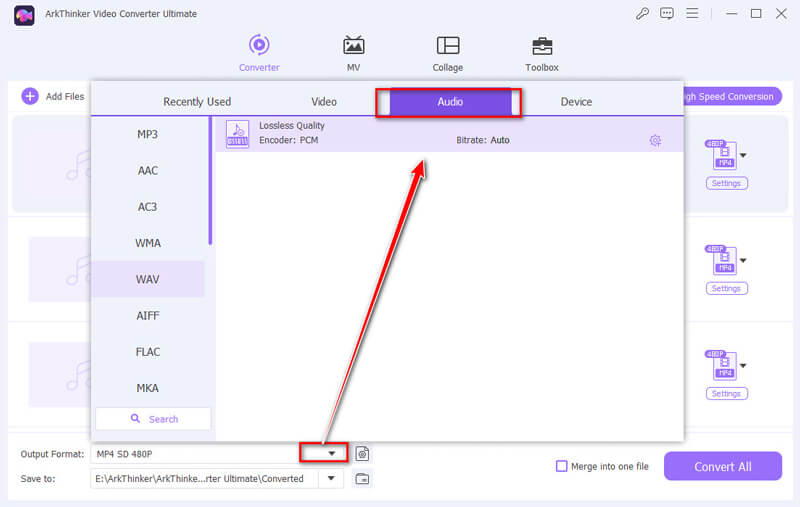
Select WAV as the output format
Once the M4A file(s) are added, click the Output Format dropdown menu at the bottom left of the interface.
Navigate to the Audio category in the Profile menu, and select WAV from the list.
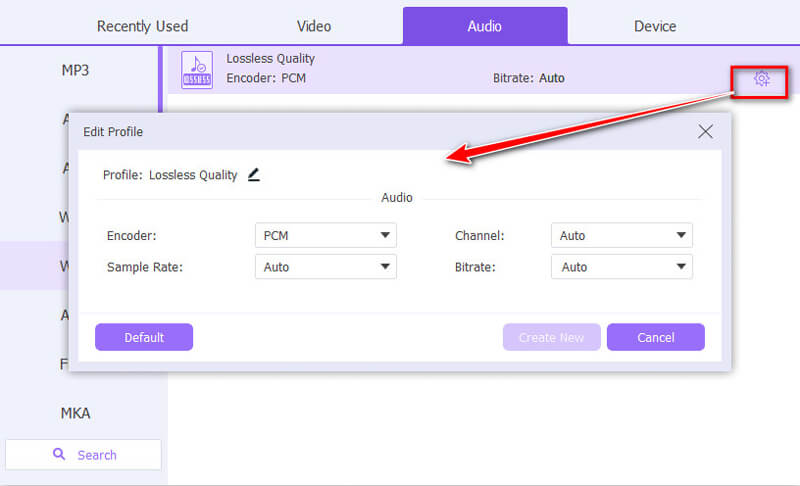
Choose the output settings (Optional)
By selecting the Custom Profile button adjacent to the output profile dropdown menu, you can alter the output parameters.
Adjust the audio codec, sample rate, bitrate, and channels as needed.
Click OK to save the changes.
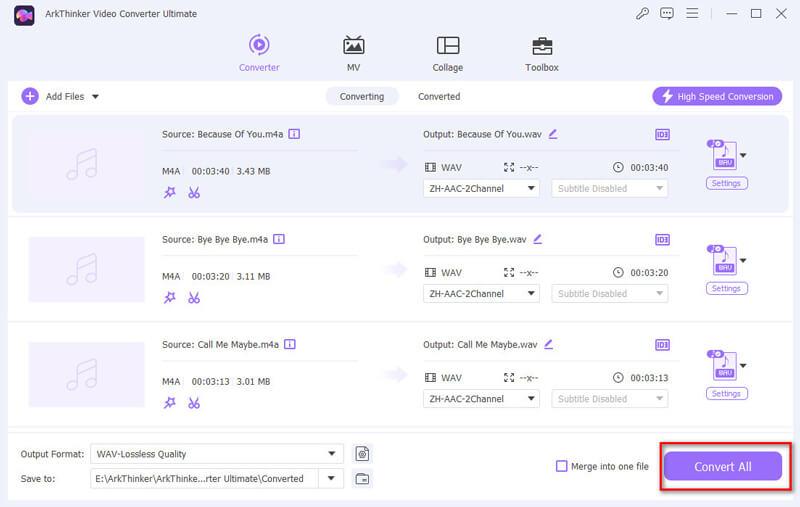
Start the conversion
Click the Save to button next to the Output Folder field at the bottom of the interface. Select the target folder where the WAV files should be saved after conversion.
Once all settings are configured, click the Convert All button to start the conversion process.
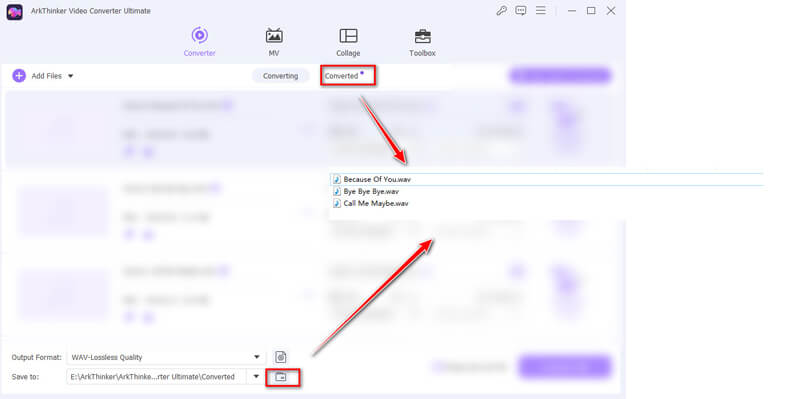
Access the converted WAV Files
After the conversion is complete, a confirmation message will appear.
Click the Open output folder button or locate the Converted tab to access the output folder where your converted WAV files are saved.
Personal tips:
1. Use the batch conversion feature to save time. You can adjust the settings to make the output fit your own requirements.
2. If you want to convert M4A to other formats like MP3, FLAC, OGG, etc., you can select the output format for each M4A file by clicking the output format next to each file.
3. To achieve a super-fast conversion speed, enable the GPU acceleration option at the top-right corner.
4. This tool also supports audio editing, such as trimming audio, merging WAV, denoising audio files, and more.
Summary:
This tool is perfect for users looking for high-speed, high-quality conversions with extensive customization options.
- Fast conversion speed.
- Batch conversion.
- Extensive format compatibility.
- Advanced customization options.
- Paid software.
How to Convert M4A to WAV in Zamzar
Zamzar is a versatile online file conversion tool that simplifies the process of converting M4A to WAV. Because it can handle a large number of file types, it's a great option for people who want to convert files quickly and easily without having to download any software. Zamzar is known for its user-friendly interface and convenience, though it may have limitations in terms of file size and conversion speed for larger files.
To convert M4A to WAV using Zamzar, follow these detailed steps.
Visit the Zamzar Website
Launch your browser and navigate to https://www.zamzar.com/convert/m4a-to-wav/ to access the Zamzar website.
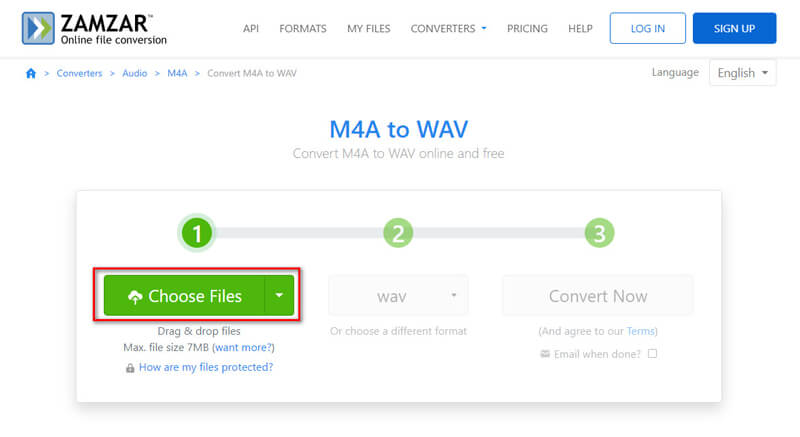
Upload the M4A File
Click on the Choose Files button. This will open a file selection window. Navigate to the location on your computer where your M4A file is stored to select the M4A file to Zamzar.
If you want to convert video to audio, like MP4 to MP3, then you can add your video file here.
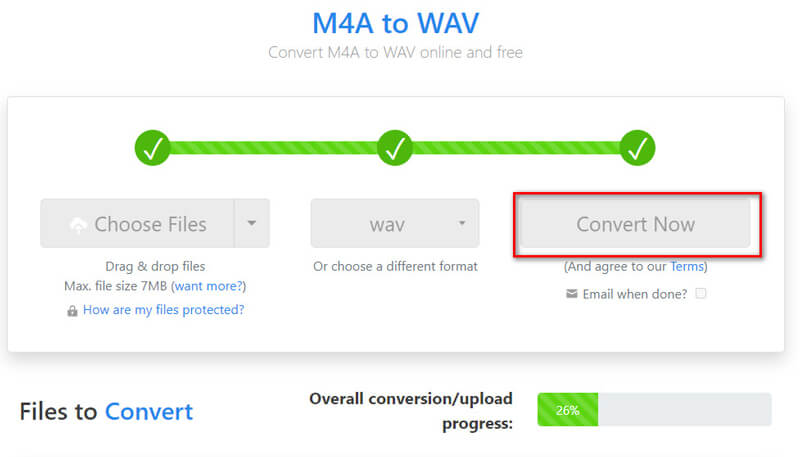
Select WAV as the Output Format
After uploading your M4A file, you will see a dropdown menu or a list of available formats. From the list of output formats, select WAV. This sets the desired format for the conversion.
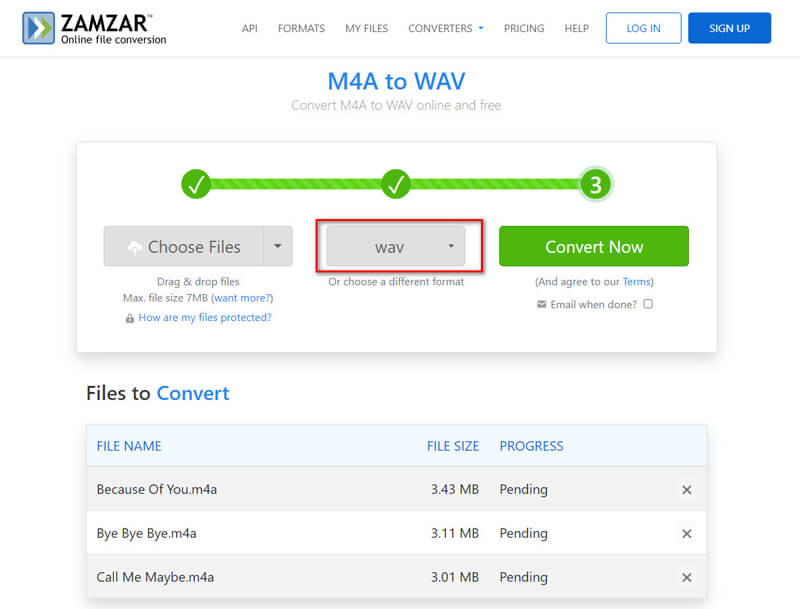
Start the M4A to WAV Conversion
Click on the Convert Now button to begin the conversion process. Zamzar will now process your file. The size of the file and the server load will determine how long it takes.
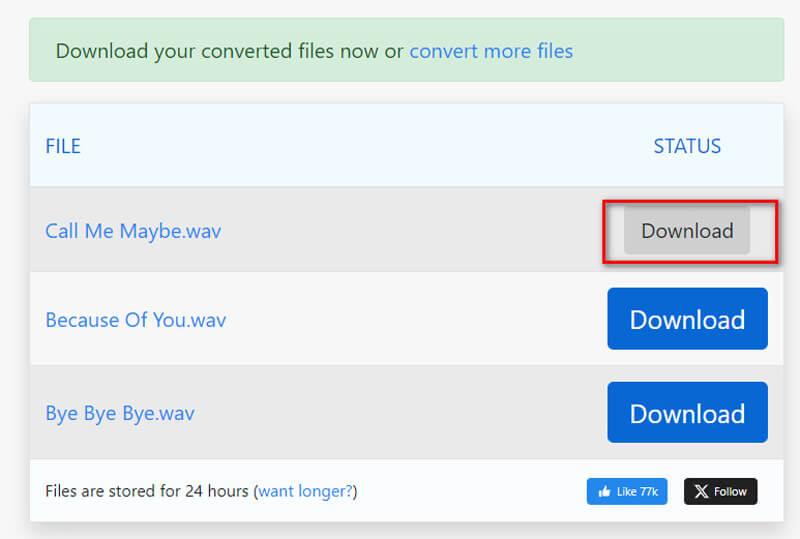
Download the WAV File
Once the conversion is complete, you can click the Download button to save the converted WAV file.
But Zamzar only supports 2 free conversions.
To remove the limits, you have to create a Zamzar account and subscribe to download the converted WAV files.
Personal Tips:
1.If you have multiple M4A files to convert, you can upload and convert them in batches, following the same steps for each file.
2.Be aware of any file size limits imposed by Zamzar for free conversions. If your file exceeds 7MB, consider splitting it or using a different conversion tool.
3.Make sure your internet connection is stable to avoid interruptions.
Summary:
Zamzar is convenient for quick, one-off conversions but may lack the quality and speed of dedicated software. Also, for the private audio file, you should be more careful.
- No installation required.
- Free to use.
- Easy to use.
- Dependent on internet speed.
- Limited customization options.
- Varying output quality.
How to Convert M4A to WAV With VLC
One of the most popular free and open-source multimedia players is VLC Media Player, which can play a wide range of audio and video formats, including WAV and M4A. As a conversion tool, VLC offers a straightforward way to convert M4A files to WAV through its built-in media conversion features. This functionality makes VLC a convenient and accessible choice for users looking to convert audio files without needing specialized software.
Open VLC Media Player
Launch VLC Media Player on your computer. If you don't have it installed, download and install it from the official VLC website.
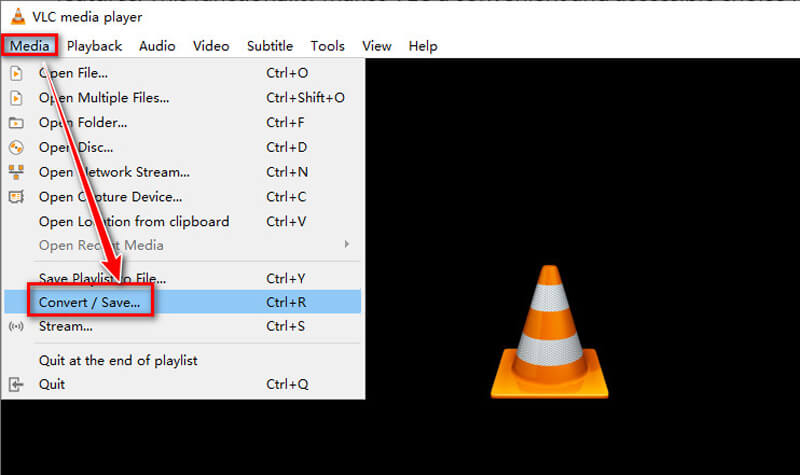
Access the Convert/Save Feature
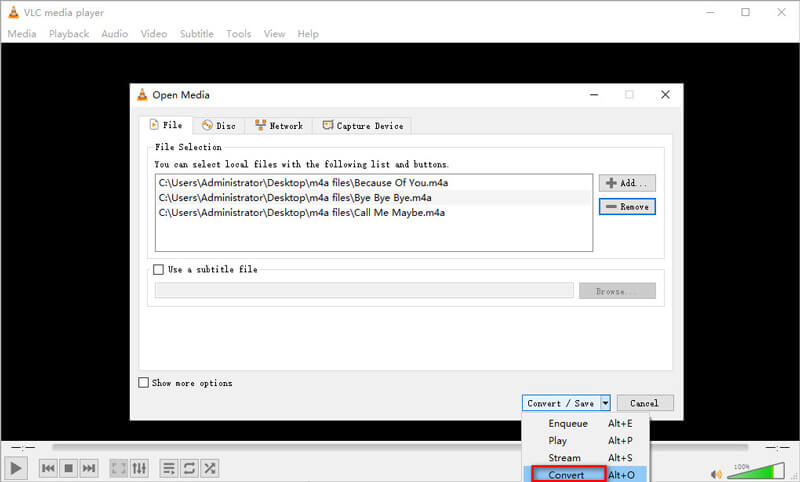
Click on the Media menu at the top left corner of the VLC window. From the dropdown menu, select Convert / Save... to open the Open Media dialog box.
Add the M4A File
In the Open Media dialog box, click the Add... button. Browse and select the M4A file you want to convert.
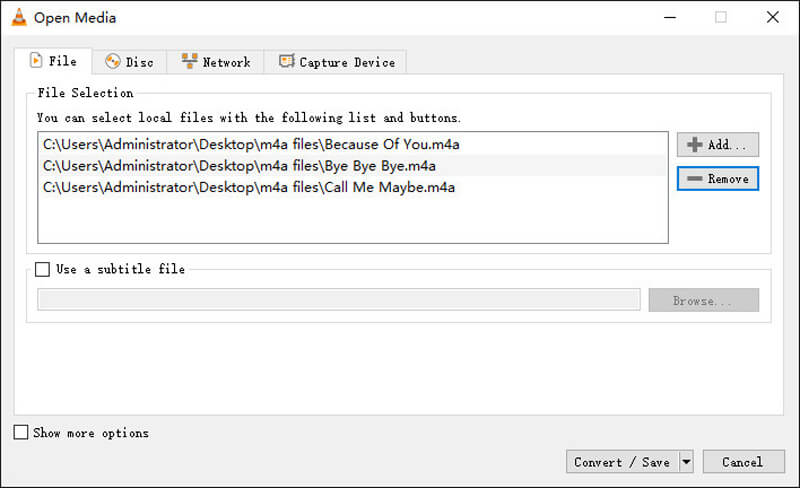
Start the conversion process
After adding the M4A file, click the Convert / Save button at the bottom of the dialog box. This will open the Convert dialog box.
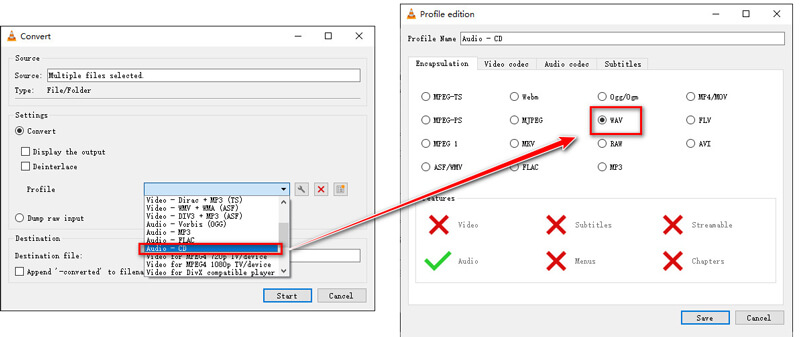
Choose the WAV output format
In the Convert dialog box, look for the Profile dropdown menu. Select Audio - CD or any other WAV profile available in the list.
Select destination file
In the Destination section, click Browse to choose the location where you want to save the converted WAV file.
Enter a name for the output file and ensure that the file extension is .wav. Then click Save.
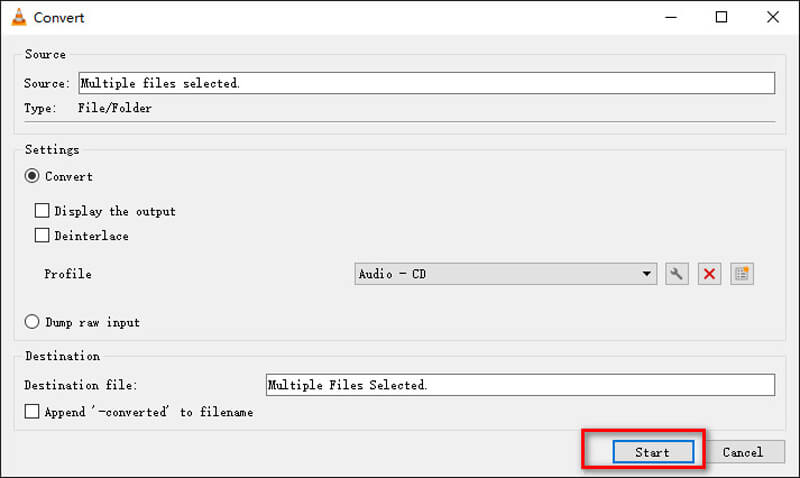
Start the M4A to WAV conversion
Once everything is set, click Start to begin the conversion process. VLC will now convert your M4A file to WAV format.
Once the conversion is finished, locate the destination folder to find the converted WAV files.
Personal tips:
Explore VLC's advanced options to fine-tune your conversions. Once you master it, it's a powerful tool.
Summary:
VLC is a reliable and free tool for converting M4A to WAV with decent speed and quality. However, it is not designed as an audio converter so that the interface may be old or unfriendly for some users.
- Free and open-source.
- Wide format support.
- Available on multiple platforms.
- Moderate conversion speed.
- Interface can be complex for beginners.
Part 3. FAQs
How can I convert M4A to WAV for free?
You can make use of free programs like online converters, iTunes, and VLC. Each of these tools offers a straightforward method for converting M4A to WAV without cost.
What is the best tool for converting M4A to WAV?
The best tool depends on your needs. ArkThinker Video Converter Ultimate is excellent for high-quality and customizable conversions. VLC and iTunes are reliable choices for free and quick conversions.
Does converting M4A to WAV improve quality?
Converting M4A to WAV does not improve the original audio quality since the process is not lossless. However, it preserves the existing quality and ensures no further loss, making WAV files suitable for professional use.
Conclusion
Converting M4A to WAV is a smart move for those seeking to maintain high audio quality and compatibility. Each of the tools mentioned: iTunes, ArkThinker Video Converter Ultimate, ZamZar, and VLC, offers unique advantages. Choose the one that best fits your needs and enjoy the superior sound quality of WAV files.
What do you think of this post? Click to rate this post.
Excellent
Rating: 4.9 / 5 (based on 415 votes)
Find More Solutions
A Step-by-Step Guide to Help You Convert SWF to MP4 Converting WebM to MP4 Using 3 Hassle-Free Techniques Best Ways to Convert MP4 Videos to GIF or Vise Versa How to Convert Video to GIF: Easy and Quick Approach Meta ArkThinker Free MOV to MP4 Converter Online [Easy to Use] How to Get Your MP4 Movie and Export It from VLC PlayerRelative Articles
- Convert Video
- What is DAV File and How to Play It
- Ultimate Review to XMedia Recode [Steps Incl.]
- Best 5 Ways to Help You Convert QuickTime Format to MP4
- How to Get Your MP4 Movie and Export It from VLC Player
- VideoSolo Video Converter Ultimate Review [2024]
- Top 2 PAL to NTSC Software & How to Convert Them
- A Reliable Review of the Top-Ranked HEVC Converters
- A Review of Freemake Video Converter to Help You Into It
- Can We Play MKV Files on Your iPhone and How to Realize It
- ArkThinker Free MKV to MP4 Converter Online [Fast and Safe]